1) Our bookshelves were yucky old particle board shelves from IKEA.
2) We have lots of books.
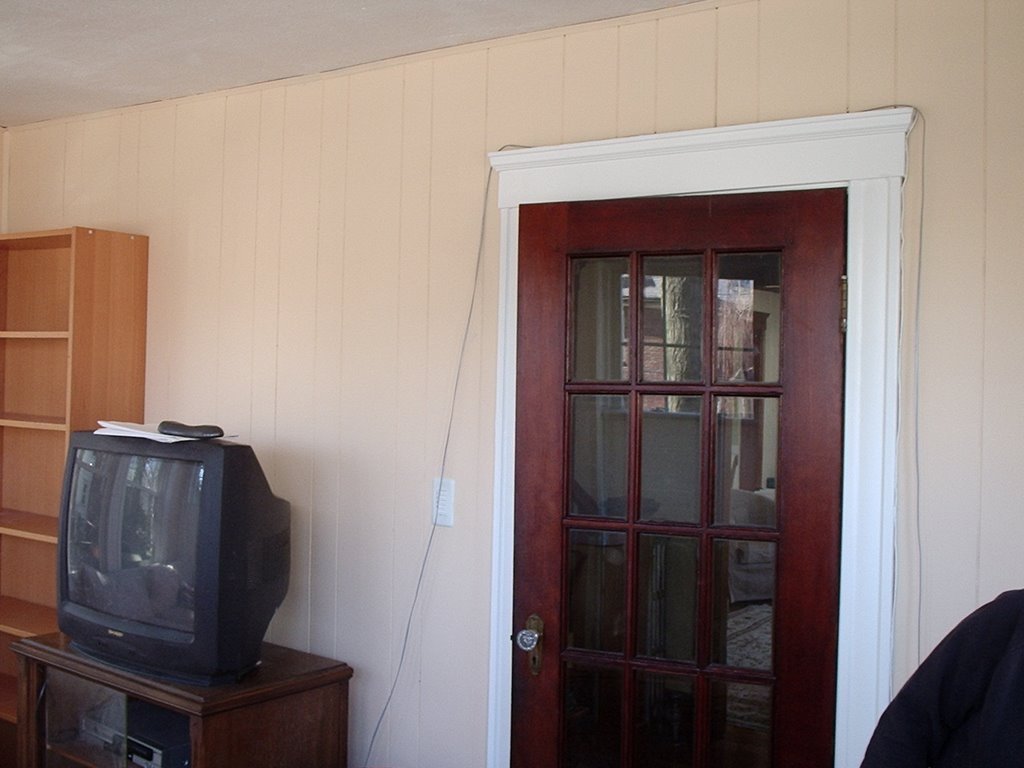
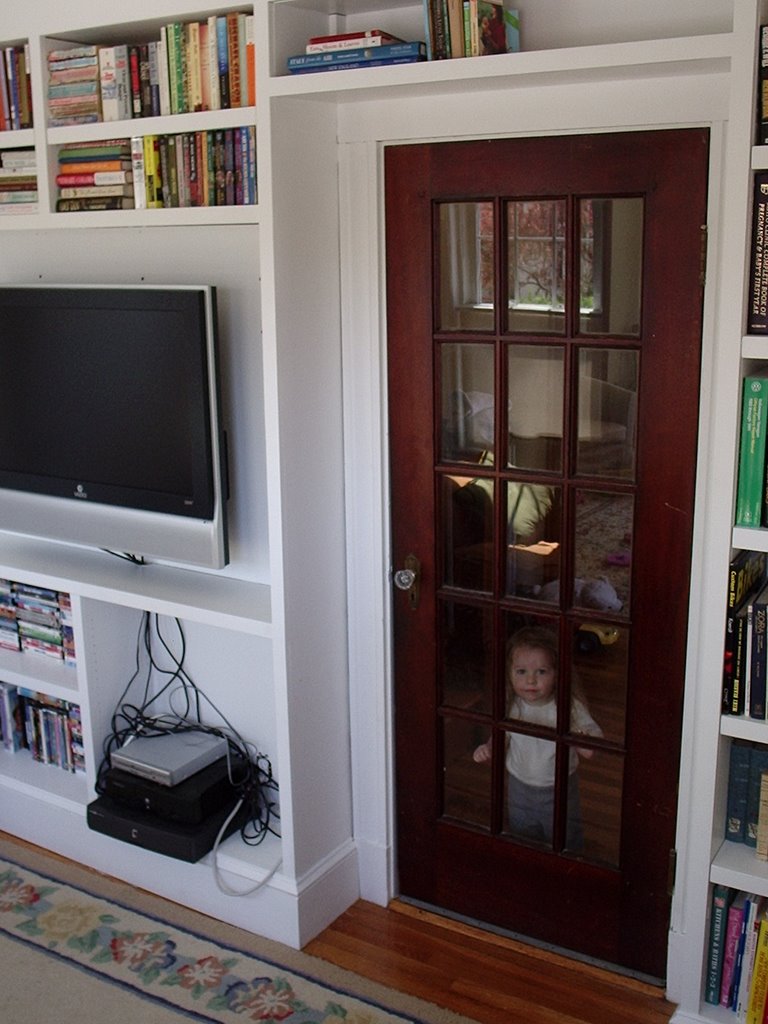
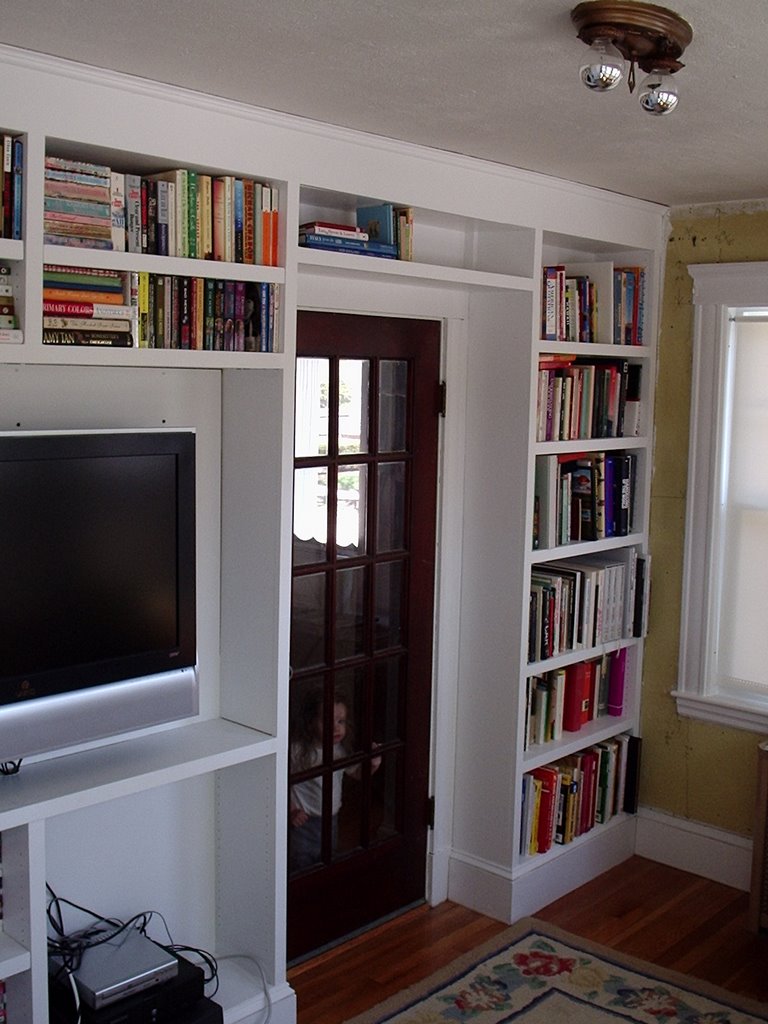
3) We watch TV, and our TV took up a large amount of space in our small sunroom in our small house.
4) Professionally-built built-ins are expensive. Like, old Porsche expensive. I can't get behind that.
I started researching doing a built-in project myself. I looked at a lot of books, and Becca and I went through a lot iterations on the plans we drew up on a large piece of drafting paper.
 I didn't find any design I really liked until we happend to TiVo an episode of The New Yankee Workshop in which Norm Abrams builds some Georgian bookshelves. I reasoned that those bookshelves could be built and then joined with common crown molding and baseboards. So I copied the plans from watching the show (I ordered the blueprints but they never came).
I figured that I could buy a table saw, an air compressor, a nail gun, the materials, and a big LCD TV for less than half of what it would cost to hire a carpenter. And I would get a light coating of moisture-absorbent sawdust in my basement, which is nice.
We decided to build the units from 3/4" hardwood plywood, with solid poplar edging. We also decided to paint the shelves white, even though the wood on the shelves would have been beautiful stained. The shelves are in a sunroom, and all of the trim around the eight windows in that room is painted white. We also decided the make the backs of the shelves from solid wood rather than from beadboard. This give the shelves a pretty plain, simple look that matches the house's other detail.
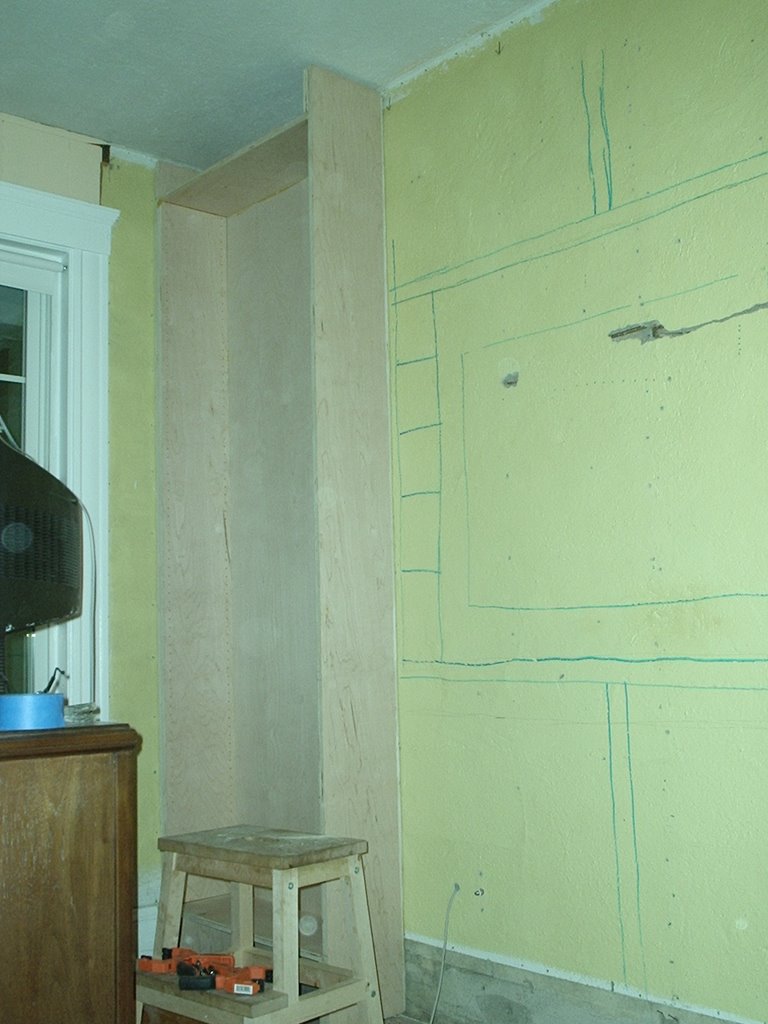
First, we had to tear off all of the old paneling in the room. The plaster underneath had some holes, but we didn't care because it would be covered up. I built the shelves as independent units in the basement and then brought them upstairs to be joined. The exception to this was the center unit, which was too large to get through the door.
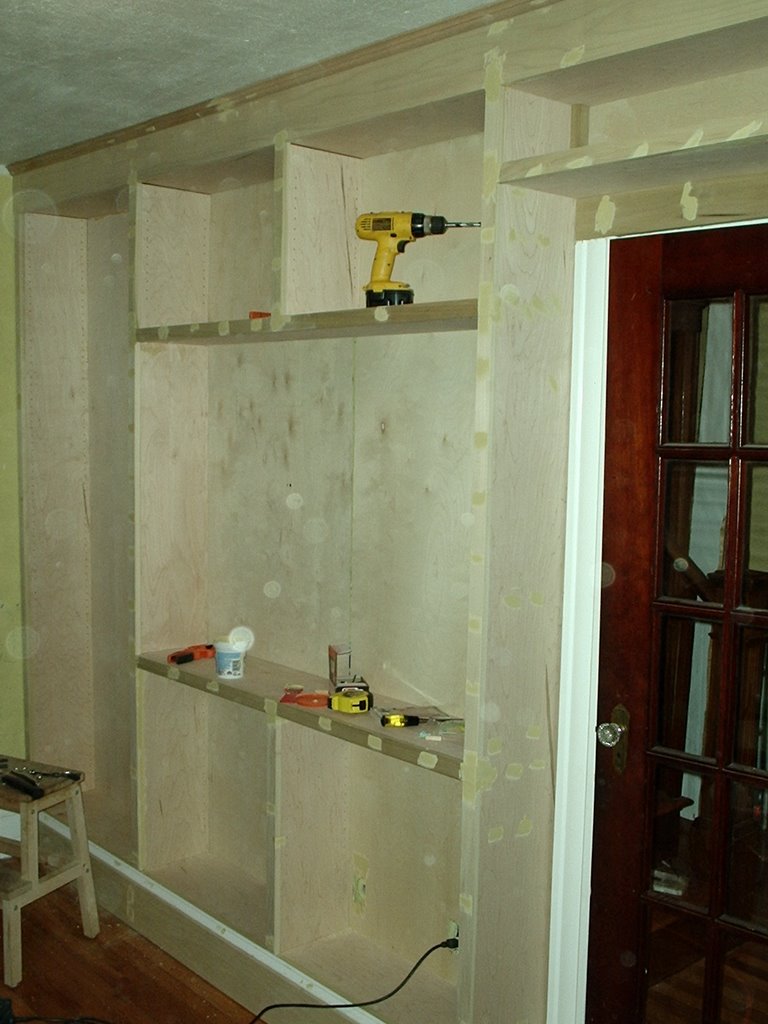
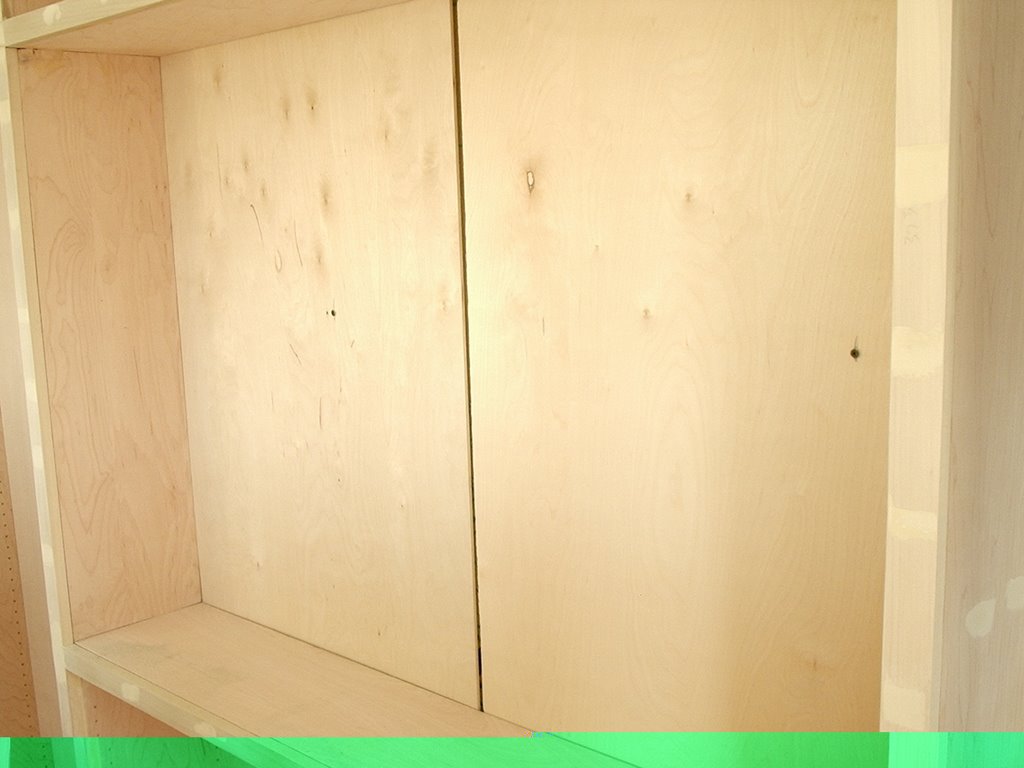
 So I built that in the sunroom. The pillars of the bookshelves are 1.5" thick, or two pieces of 3/4" plywood sandwiched together. So where two units met, each of the units was only one piece of plywood thick. The shelves are about 10" deep. I drilled many little holes for shelf pegs using pegboard as a template. The underside of each shelf has four slots dadoed into it to accomodate the pegs and keep the shelves from sliding out. The poplar edging was nailed on using my pneumatic brad nailer, and then the hole was puttied over.
The crown molding and baseboards tie the whole thing together nicely.
 We found millwork to match our existing baseboards.
Becca and our good friend Heather primed and painted the whole thing over the course of two days. It is quite simple looking.
 We were tempted to get fancy and put nice millwork on the edges, but the simple look really matches the house.
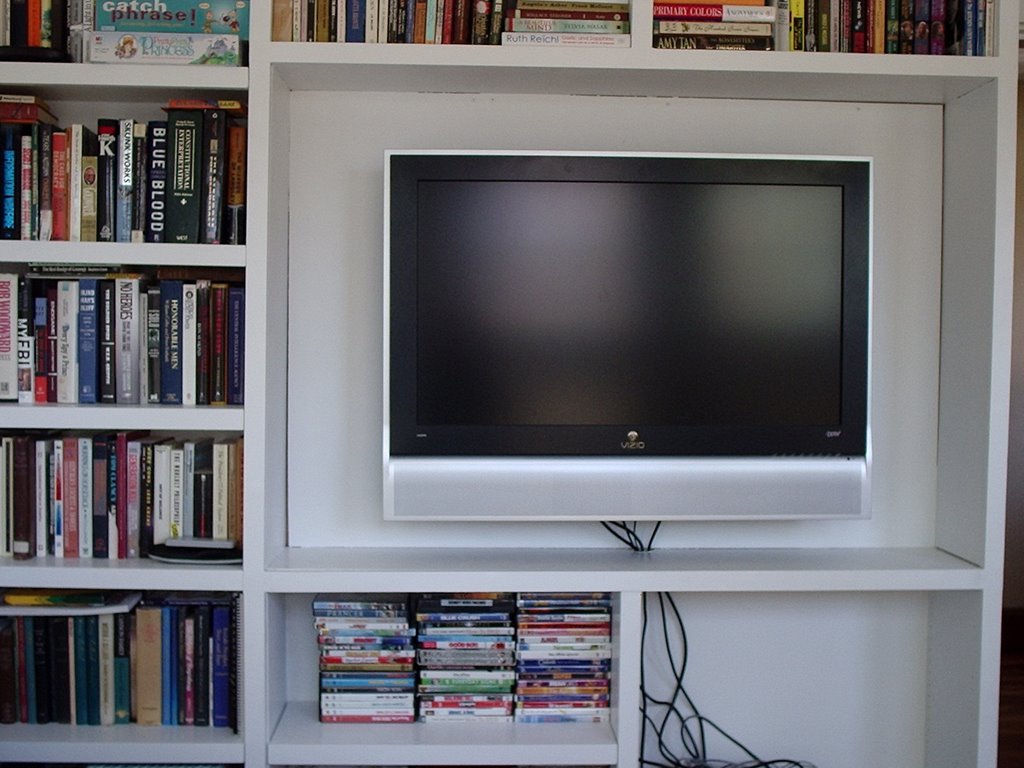
The place for the holy TV is reinforced to carry its weight. The wall behind the TV is 1.5" thick, and it the whole thing is screwed into studs behind the shelves. The TV is AWESOME. And because it is only 5" think, it doesn't intrude into the room the way the old TV did.
20 comments:
Nice work, simple, but elegant and it gives me some idea's on what I have been playing with in my mind. Thanks
pretty dang sweet!
Um, WOW! So I googled "built in bookshelves" because my husband and I want to do this in our new living room and found this blog post. I am inspired. You did a wonderful job!! Thanks for sharing with the internet community so others can learn from your process.
Fab project ... Just need to camoflauge the wires.
Great job, i'm in the process of finishing my basement and in my "search" of how to build "built in shelve's" i stumbled across your blog page.
Great work you've inspired me to get my project started. Well done, keep up the good work :)
HOLY CRAP!!! i am soo impressed! they look GREAT!! and what a great idea to post how you did it! thank you!! really...THANK YOU!
Very nice! One question. I have been thinking about built-in shelves. Rather than building on top of the wall; if the wall was not a structure wall, could you tear off the wall and use the existing studs to be the frame work of the shelves? also this would make the shelves taking less space... maybe like 5 inches less but it would still be less?
Nice Work!
Wow, great job on your built-ins!
I came across your site after searching for built-ins. Do you have any plans and more info on how you constructed and attached the shelves? I'd appreciate any help you could offer.
How are the vertical boards, you called them "pillars" attached to the wall? Could you add some links to the hardware you used? I too was googling for a how-to and your project is *exactly* like what I am on the fence about trying myself...
Thanks for the comment. I fastened the shelf units to the wall by screwing them into the studs in the wall. I did this only at the very top of the shelf units, actually ABOVE the top shelf you see the the photos there. The back of the shelf units (the big piece of plywood) extends above this shelf, all the way to the ceiling just as the pillars do. So I just stood on a step ladder and reached in up there with a drill and drove in big 2.5" screws in the studs. It doesn't have to be pretty, and it carries no weight. It just keeps the builtins next to the wall. It is VERY solid. And when you cover that space up with the top plate and crown molding, it is completely hidden.
Couple of questions: How are the pillars (which if I understand correctly are two layers of 3/4" plywood) attached to the plywood that makes up the backing for the shelves? Also, you mentioned reinforcing the panel where the TV is attached. Is that just two layers of plywood where the others parts are 1? And is the TV mount bolted to studs behind the plywood, or just the two layers of plywood?
I found that episode of the New Yankee workshop, and can see how the vertical pieces are constructed to create adequate support for the back and fixed top and bottom shelves. How did you do it at for the center vertical pieces where they are only a single piece of 3/4" ply thick until you put the two units together? I am working on a similar 3 unit project, and thought that I'd make all of units with a two layer back, which would create the rabbit to accept the vertical pieces. The vertical pieces would all run floor to ceiling, but thought I'd see if you had a better solution. Thanks for posting this.
Ben, sorry for taking so long to respond. For the center vertical pieces, I made them all double thick--they are all two 3/4" pieces of plywood faced by the piece of poplar. I built each unit separately with a pneumatic brad nailer and wood glue. Mounted on the wall, they mate up, and then face them with the poplar.
Thanks for the pictures and information. I have done a few projects in my home and am thinking of doing a built in shelving unit. I was browsing the internet and came across this page. Wonderful job. Thanks!!
Thanks for the pictures and information. I have done a few projects in my home and am thinking of doing a built in shelving unit. I was browsing the internet and came across this page. Wonderful job. Thanks!!
So if you were to stain and not paint would you not putty over the brad nails? Trying to figure out how to avoid seeing the brad nails when staining vs painting. Thanks.
YOu did a great job :)
I am so copying you! Awesome work. Your post has settled a number of design approach questions I have been tossing around for my quite similar project. Thanks.
Great job! Thank you for thinking to take photos along the way-- the finished product could be in a magazine-- I am inspired!
Post a Comment