Thursday, August 31, 2006

Oops, I did it again...


I sold my van (see the airspeed indicator below) and bought a 1980 Porsche 911SC Targa. This is my fourth Porsche. I feel a little sheepish driving this car around because it looks pretty nice. There is a lot of cultural baggage associated with Porsches. I just like its engineering and the way it drives. I would be happy if people thought it was a VW bug. I got a good deal--it is in pretty nice shape. There are a few little projects I need to do, and I'll post them here. The first project I did (unfortunately not documented) was to fix a broken trip odometer. I pulled the speedometer out of the dash and took it apart. I had to superglue a gear's support back into place. It works great now. More to come.

Thursday, August 10, 2006

SpaceShipOne

I took a road trip with three of my very good buddies to witness the first space flight of Burt Rutan's SpaceShipOne. We stayed in an a Motel 6 in Mojave next to the railroad tracks. The morning of the flight, we arrived at the airfield around 4:00 AM to find it packed with every nerd that lived within a 1000-mile radius. So we fit right in. The flight was successful and spectacular. I took these photos with a Pentax ME Super with a big zoom on it. The photos are scanned, so they are of lower quality than we might like.

This is the space vehicle with its mothership climbing to launch altitude:

This is moments after the space ship's rocket was ignited and it is heading towards vertical. It took off nearly directly into the sun from our vantage point:

Here the space ship continues to climb. The plume from the rocket was a bit twisty as a result of maneuvering by the pilot:

More climbing:

This is first sight of the craft as it came down. It is gliding:

After the craft slowed enough, it was escorted by two chase planes, a Beech Starship and a small aerobatic plane:

More escorting:

The aerobatic plane popped some smoke in celebration of the successful flight:

Tuesday, August 08, 2006

My Rental Car

This is the way I park when I am in Milan:


This is the way I roll when I am driving over the Simplon Pass in Switzerland:


Mit Kompressor, ja?

Strongbad Birthday Cake


Becca made this cake for our friend Jeff's birthday. It is a French recipe from our French friend Marie-Laure. Would that make it a freedom cake? There is basically nothing but eggs and chocolate in the cake. Preferably Scharffenberger chocolate.

It fell to me to decorate the cake. I decided to do a monochrome rendering of Strongbad in powdered sugar. I made two templates for the cake. I placed the first one over the cake and did the lightly powdered areas with a flour sifter. Then I placed the other template over the cake (being careful not to disturb the first layer of sugar) and did a heavier coating. It turned out pretty well.

Monday, August 07, 2006

Bike #2, Diamondback Approach Hybrid Fixed Gear

After I commuted on my Van Dessel Superfly for a while, I decided to try something new. My good friend Dave had recently converted his Miyata road bike to run with a fixed gear. Dave is a serious cyclist, and he really liked riding his Miyata to work. I decided to find a bike to convert to fixed gear.

Fixed gear bicycles have only one gear and no freewheel, which means the rider cannot coast, but rather must pedal while the bike is moving. There is a fixed relationship between rear wheel speed and crank speed.

I really liked the idea of converting a "hybrid" bike rather than a dedicated road bike or mountain bike. I reasoned that the hybrid's geometry would be a little more relaxed and that it might be better for potholes and frost heaves. So I searched around and found a Diamondback Approach hybrid on Craigslist. It was very reasonably priced and seemed to have spent most of its life in a garage.


When I got it home (the punk kid who was selling it for his mom lived only two blocks from my house) I stripped off most of the components. I purchased a bargain-basement flip-flop rear wheel along with a new front wheel. The Diamondback came with 700c wheels, but I the new wheels were 27" wheels. The diameter difference is negligible, so the existing cantilever brakes worked with only minor adjustments.

I put a nice Sugino crank on the bike. It was one I recovered from another Craigslist purchase, a small Bianchi road bike. Its smaller chain ring had 42 teeth, which in concert with the 16-tooth cog on the rear wheel gives an ideal ratio for my commute. One of my main challenges was getting the chainline right. I resorted to deforming the right chainstay on the bike to accomodate the chainring. I bashed it with a ball peen hammer until it gave enough clearance. I am not too worried about weakening the frame because it is steel.


I put the stem from the Bianchi on the bike, along with the aluminum seatpost and the seat from the Van Dessel. I also put the brake levers on the flipped and cut down handlebars. These bars look a little goofy, but they are extremely comfortable. They provide about the same hand position as a modern STI shifting system, but there are no drops in the bars. I don't use those anyway. Also, the exposed cables make the bike look kind of old school. Adding fenders makes a huge difference when it is raining or when there are puddles.

After I built up the bike and was satisfied with it, I commuted for a few weeks on it. I liked it so much that I decided to fully make it my own by painting it. I stripped everything off of the bike, down to the headset bearing cups. I sanded and painted it with a spray can. I did a few coats of reflective "license plate" paint, followed by clear coat. I also masked a few snowflakes into the paintjob.


This bike rocks. If I ever build a frame of my own, I will probably try to replicate the geometry on this bike. It is really great. I am constantly on the lookout for a duplicate, identical bike.

Friday, August 04, 2006

Breakfast Nook Table

I built a table, or rather, I built a tabletop to fit in our breakfast nook. When we moved into our house, the breakfast nook had some really ugly formica stuff from the 1970s. And this was not hip 1970s stuff. It was nasty 1970s stuff.


So I bought a cherry dining table on craigslist.org. The tabletop was oval originally. I cut the table to the right dimensions to fit the breakfast nook (complete with benches advertised as having accomodated Woodrow Wilson's intelligent butt at some point in their history). We painted the table white to match the benches and trim in the kitchen.


I then screwed cement board underlayment to the top of the table and trimmed the edge with oak and polyurethaned the oak. The oak was cut using a mitre box and a hand saw. I tiled the top of the table with bathroom tile, then used flexible grout around the edges between the tile and oak trim. Apparently the oak expands and contracts, and this will cause cracks in normal grout over time. Bacteria can then hang out in the cracks. I grouted the rest of the table normally. It has served us well for nearly a year.

My Automobile Airspeed Indicator

Sometimes I wonder what is the airspeed of my van. You might think this is not that important. You might be right about that. But I DO drive a van (a Volkswagen Vanagon) with the aerodynamics of a barn door. So the airspeed affects my car more than it does most cars. And I think it is cool.


So I took apart a pager and removed the tiny electric motor that makes it vibrate. I pried off the weight that actually causes vibration to happen. Then I made a tiny propellor from a model airplane's propeller and some clear plastic. I made a mount for the motor from a small piece of plastic, and then I JBWelded the bracket to a clamp I made on my lathe. This bracket fastens to the Vanagon's antenna, which is right at the front of the van where it can catch a nice, steady stream of oncoming air. The coup-de-grace is the wiring for the motor. I had to drill through the motor mount to get a wire into reliable contact with the motor's case. The other wire is soldered to a screw that contacts the back of the motor.


I led the wires from the antenna through the driver's side wing vent window. From there, I alligator-clipped them to my voltage meter. I can watch the voltage go up on the voltmeter as the van's speed increases and the little generator catches air. It doesn't register much below 15 mph, and I imagine that it would fly apart above 80 or 90 mph. But the van doesn't go much faster than 80 mph.

Thursday, August 03, 2006

Our Built-In Shelves

Here are the problems that led us to build built-in bookshelves in our sunroom:

1) Our bookshelves were yucky old particle board shelves from IKEA.
2) We have lots of books.
3) We watch TV, and our TV took up a large amount of space in our small sunroom in our small house.
4) Professionally-built built-ins are expensive. Like, old Porsche expensive. I can't get behind that.

I started researching doing a built-in project myself. I looked at a lot of books, and Becca and I went through a lot iterations on the plans we drew up on a large piece of drafting paper. I didn't find any design I really liked until we happend to TiVo an episode of The New Yankee Workshop in which Norm Abrams builds some Georgian bookshelves. I reasoned that those bookshelves could be built and then joined with common crown molding and baseboards. So I copied the plans from watching the show (I ordered the blueprints but they never came).

I figured that I could buy a table saw, an air compressor, a nail gun, the materials, and a big LCD TV for less than half of what it would cost to hire a carpenter. And I would get a light coating of moisture-absorbent sawdust in my basement, which is nice.

We decided to build the units from 3/4" hardwood plywood, with solid poplar edging. We also decided to paint the shelves white, even though the wood on the shelves would have been beautiful stained. The shelves are in a sunroom, and all of the trim around the eight windows in that room is painted white. We also decided the make the backs of the shelves from solid wood rather than from beadboard. This give the shelves a pretty plain, simple look that matches the house's other detail.


First, we had to tear off all of the old paneling in the room. The plaster underneath had some holes, but we didn't care because it would be covered up. I built the shelves as independent units in the basement and then brought them upstairs to be joined. The exception to this was the center unit, which was too large to get through the door. So I built that in the sunroom. The pillars of the bookshelves are 1.5" thick, or two pieces of 3/4" plywood sandwiched together. So where two units met, each of the units was only one piece of plywood thick. The shelves are about 10" deep. I drilled many little holes for shelf pegs using pegboard as a template. The underside of each shelf has four slots dadoed into it to accomodate the pegs and keep the shelves from sliding out. The poplar edging was nailed on using my pneumatic brad nailer, and then the hole was puttied over.


The crown molding and baseboards tie the whole thing together nicely. We found millwork to match our existing baseboards.

Becca and our good friend Heather primed and painted the whole thing over the course of two days. It is quite simple looking. We were tempted to get fancy and put nice millwork on the edges, but the simple look really matches the house.

The place for the holy TV is reinforced to carry its weight. The wall behind the TV is 1.5" thick, and it the whole thing is screwed into studs behind the shelves. The TV is AWESOME. And because it is only 5" think, it doesn't intrude into the room the way the old TV did.

Office Heater/AC Vent Helicopters

When I moved into my new office, I found that the climate control blower stays nearly 24 hours per day. My inner Scot was offended by the wasted energy. I fugured that even if I couldn't harness the wind power for anything useful, I could at least use it to power a piece of kinetic art.

Now, when I was a kid, I learned how to make paper helicopters. One of my great joys in life is to make paper helicopters and drop them off of tall buildings. At work, I have a beautiful 5 story drop inside an atrium. Unfortunately, there is a priceless piece of art (a mosaic floor from a Roman bath) at the bottom of this drop. So I haven't tried to drop any helicopters.

I wanted to put my lack-of-helicopter frustration to good use in my office by somehow tethering a paper helicopter of over the constantly-blowing vent.

The solution I came up with was to tie a piece of fishing line from the vent up to the ceiling, stringing it through a tube (from a Bic pen or from a mechanical pencil) that would act as the body of the helicopter. I then made wings to attach to the tube. I have built three helicopters now, each with a different design that gives it unique flying characteristics.

One has paper wings (printed with a faux wood grain). The other two have plastic wings made from overhead transparency plastic. I printed them with interesting colors. People who come to my office are always amazed. Sometimes they don't see them until they sit down on my couch and see them out of the corner of their eye. They invariably flinch because they think it is a giant dragonfly or a very quiet hummingbird.

The wings have been flying now nonstop for about a year, and show no signs of mechical wear.

I made the wings by printing out the wings and then cutting them out. I bend them to give them a downward angle of attack, and I shape them so that they have a bit of airfoil shape. Below is a photo that should work for this if you click on it and blow it up.


I did not build Rome in a day

Just so all of my many readers don't get the wrong idea--I did not do all of these inane projects over the course of two days. I am documenting a few years worth of stupidity here.

The Corn Watch

One day I was eating lunch with colleagues at work. One of them, Alan, dropped a piece of corn on his watch, and it miraculously stuck. We now call him CornWatch.

Alan asked me to fix his watch band (apparently he thinks of me as the lady at K-Mart behind the watch counter). So I disassembled his watch and inserted a few pictures under the glass of his watch. I printed the tiny photos on overhead transparency film with a color laser printer. I reassembled the watch and gave it back to him.

Adam the physicist with Miss Boron


This is funny if you are a nuclear physicist. My friend Adam (in the photo) is a physicist. We saw this nice young woman when we went to the first space launch of Burt Rutan's SpaceShipOne in Mojave, California.

Cheap bike rack


Because we don't have a roof rack for our car (our old one from our Audi wagon doesn't fit--the cross bars aren't long enough), here is how I fastened our bikes to the roof of the car for a trip to Bar Harbor, Maine.

At first it was an all-zip-tie affair. I zip-tied the bike wheels to the roof rails, then zip-tied the bikes together in a sort of tee-pee. It was incredibley strong laterally. But it turns out that any fore-aft movement of the car puts a great deal of stress on the zip ties holding the wheels because as the wheel tries to roll, it acts as its own fulcrum and lever. I popped a few of the zip ties as we got on the freeway. So I pulled over and strapped the wheels to the rails using pedal straps from my toe clips. This held without problem, probably because they are a bit more flexible than zip ties. Or rather, the failure mode is not sudden the way it is for zip ties.

It worked really well after the toe straps. Our friends Ted and Cara took the bikes home on the back of their Odyssey.

Wednesday, August 02, 2006

My Sachs Duomatic Two-Speed Hub

(This posting is a modified reprint of a webpage on my old website)

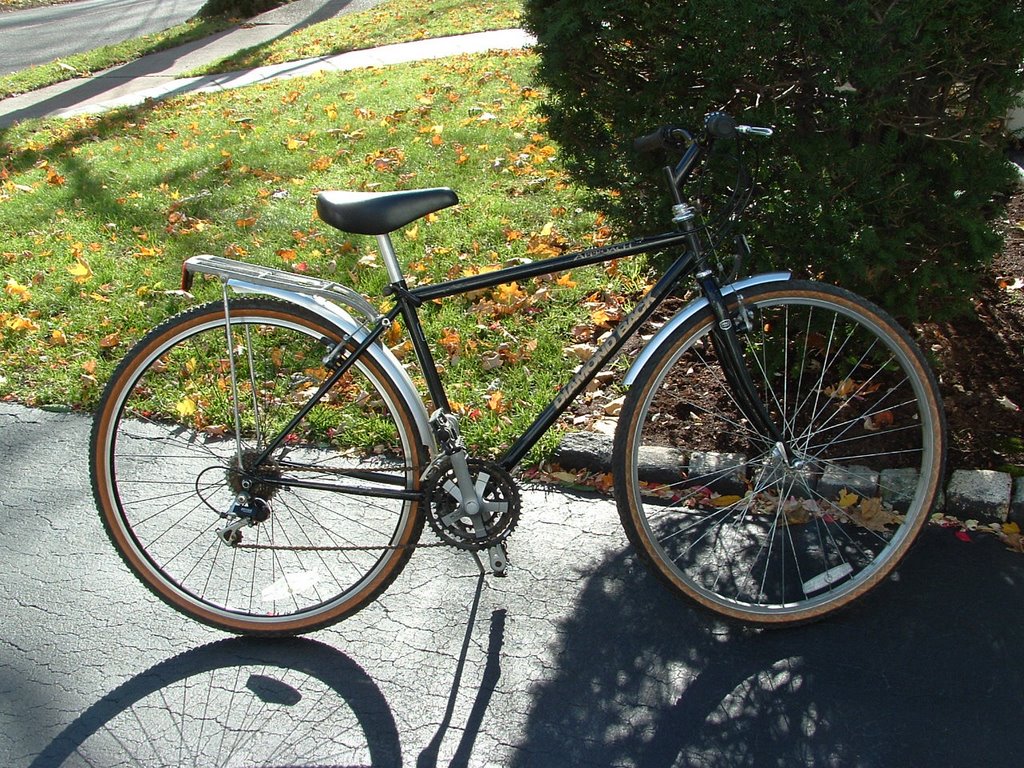
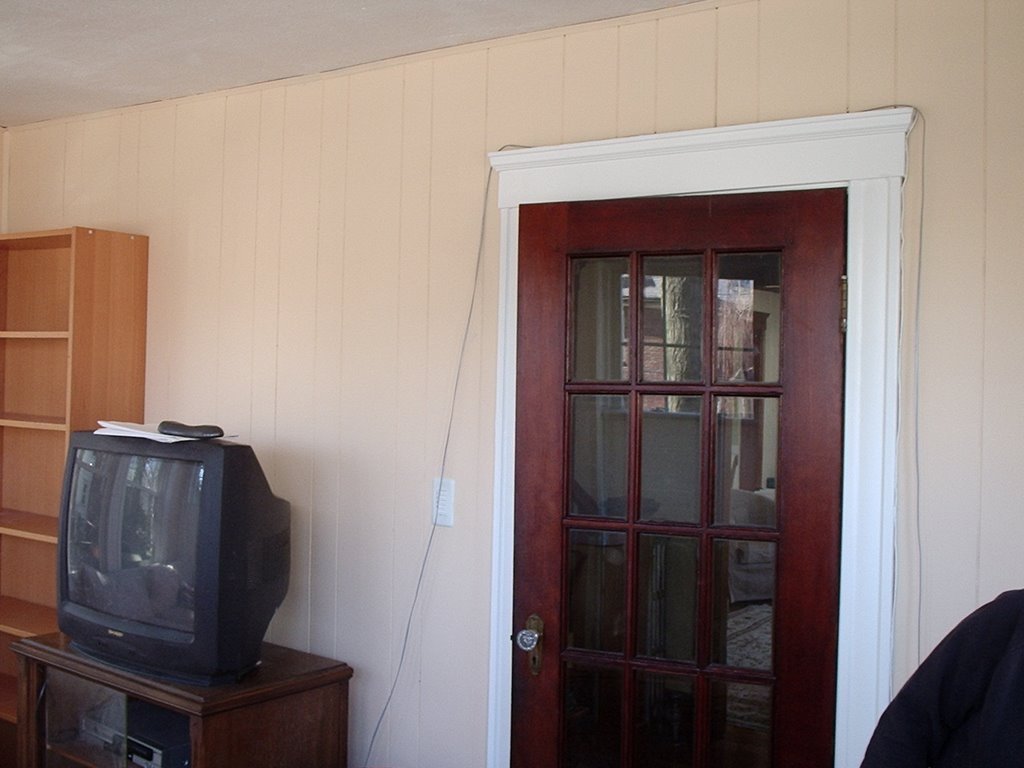
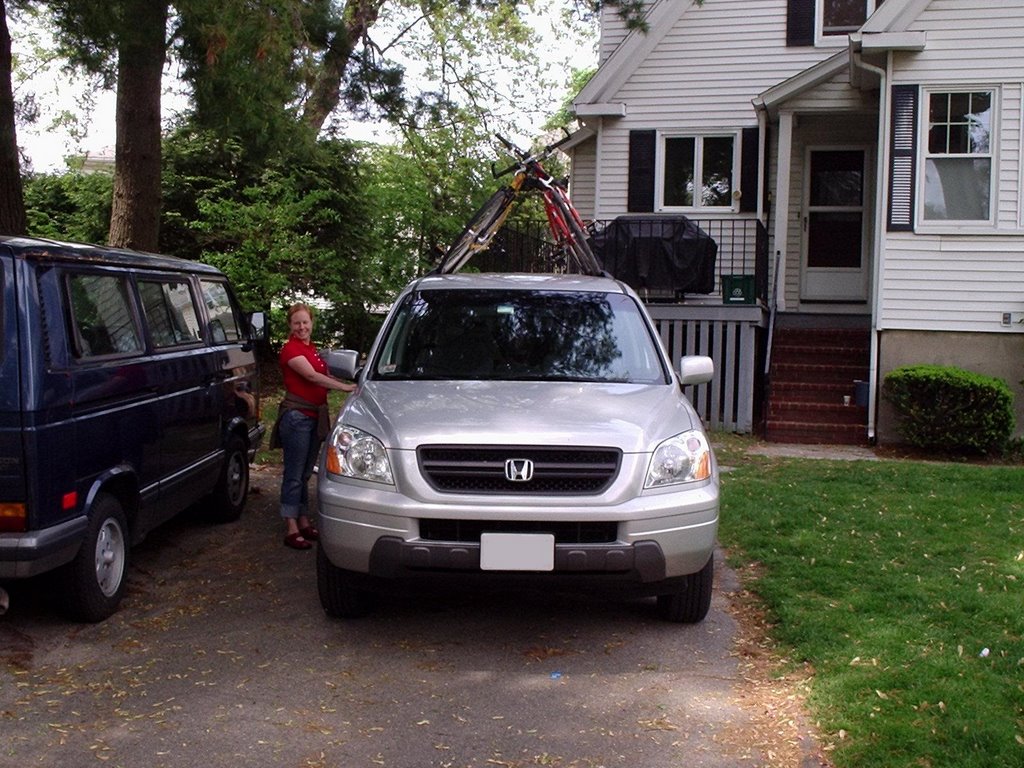
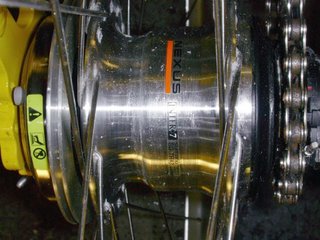
Most days, I commute on my fixed gear Diamond Back hybrid or on my Van Dessel Superfly. The Van Dessel is a great urban bike. It is equipped with a 7-speed Shimano Nexus hub. I have been very happy with the Nexus system. Its shifting cable and apparatus is inside the chainstays, which is really nice because it can't be damaged by walls, curbs, or other bikes. It looks like this:

My happiness both with the Shimano and with the fixed gear bike has led to me explore a solution that encompasses the most attractive features of internally geared hubs and of fixed gears. I like having multiple gears at my disposal. I also like the simplicity of a fixed gear bike, with its lack of cables and extra "stuff" on the bike. I also like rear brakes for the winter. I ride in the snow and ice, and I think it is stupid to ride in low-traction conditions without a rear brake. I was talking with one of the guys at the bike shop (who has been commuting on a fixed gear bike since like 1965) about this, and he said that some serious commuters build up winter commuting wheels around kids bike coaster brake hubs. They like coaster brakes because there are no shifter cables to be corroded by the salt water.

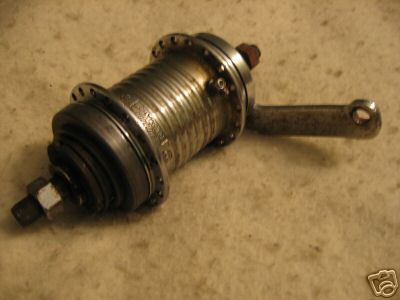
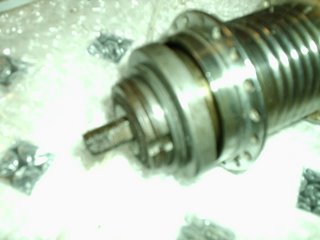
So I started poking around on eBay and stumbled onto two-speed "kickback" hubs, which came standard on many kids bikes in the 70s. Kickback hubs are equipped with coaster brakes (no cables) and they can toggle between two different gears when the rider applies slight backpedal pressure. I thought I would try to build a commuter around one of these hubs. As far as I can tell, these hubs were built by two companies--Bendix and Sachs. The Bendix units came in different gearing flavors and with different brakes. According to Sheldon Brown, they are heavier than the Sachs units. Also, the cogs on the Sachs units are easily changeable, and they use the same three-peg cogs used on Shimano and Sturmey-Archer hubs. The Bendix cogs are not easily swappable. Most important to my aesthetic sensibility, however, is the the fact that the Sachs unit is Made in Germany. I really like German-made machinery. So I found a 36-hole Sachs Torpedo Duomatic two-speed hub on eBay and bought it. This is what it looked like:

When it arrived, I debated with myself for a day over whether I should open it up and clean it up before committing to building a bike around it. I even emailed Sheldon Brown to ask his opinion. He graciously responded, advising me not to fix what isn't broke. I decided to act against his advice. I have taken apart automobile engines and put them back together and I was reasonably confident I could at least put this thing back together. Before opening it up, I verified that it worked by turning it by hand. In operation it is really cool. (Parenthetically, after I disassembled it, I found a German website with an exploded parts diagram for the Duomatic. I didn't really need it, but it is nice to have. This is the parts diagram. I hope I am not violating someone's copyright by reproducing it here.)

I am glad I opened it up, not only because I discovered a few problems, but also because the hub is a mechanical wonder. The machining is beautiful. It reminds me of the insides of a Porsche engine or of a Heckler and Koch rifle (don't ask how I know about that). Here is what it looked like as I started to open it up. I opened the cog side first (the side that doesn't have the coaster brake arm on it):

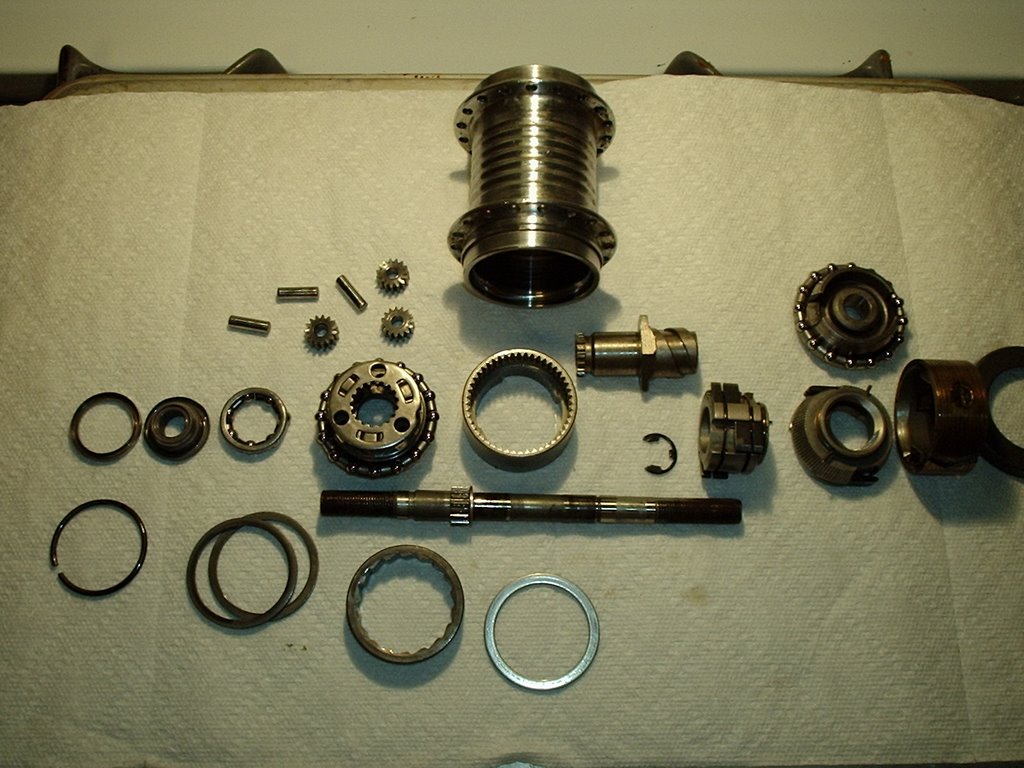
I slid parts onto a zip tie and took photos so that I would be able to keep track of them. I honestly don't know what most of these parts are called (in English, as least), but I kind of think I know what most of them do. The principle on which this thing operates is that it is always trying to shift gears, but forward pressure on the pedals makes it so that it can't slip into the other gear. If you apply back pressure, it allows a spiral part (called an "Antriebuchse") to turn and engage the "Bremskonus," shifting gears.


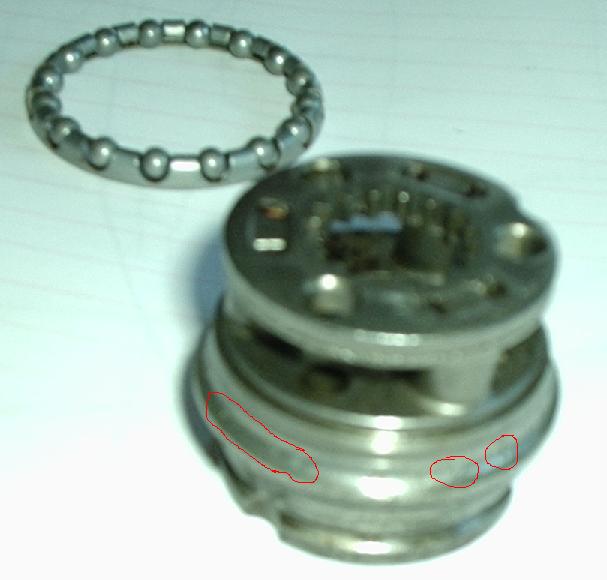
As I cleaned and disassembled, I found that a few of the bearing race surfaces were pitted. There are three roller bearings in the hub. Each roller has a cone and a ring (each of which is a race) and each has a cage with ball bearings in it. Of the three bearings, two had some pitting. The bearing on the lever arm side of the hub was in the worst shape. Both of its races were pitted and the ball bearings themselves were a bit dulled from having traveled over pitted races. My guess is that moisture got into the hub and rusted the race surfaces. On the other side, the outer race surface on the "Planetenradträger" was badly pitted. This part is seen below. It is a really neat piece of machinery. It contains three little planetary gears, held in place by three little shafts. When these planets are removed, the large bearing can come off. It is very much like field stripping an HK rifle.


The Planetenradträger contains two bearings. The smaller roller bearing inside was in good shape. But the outer one was badly pitted. An indication of how bad things were is that the ball bearing from this side were completely dulled by having run over the pits. Here are some blurry photos. I have circled the areas with pits. Notice how dull the ball bearings are:


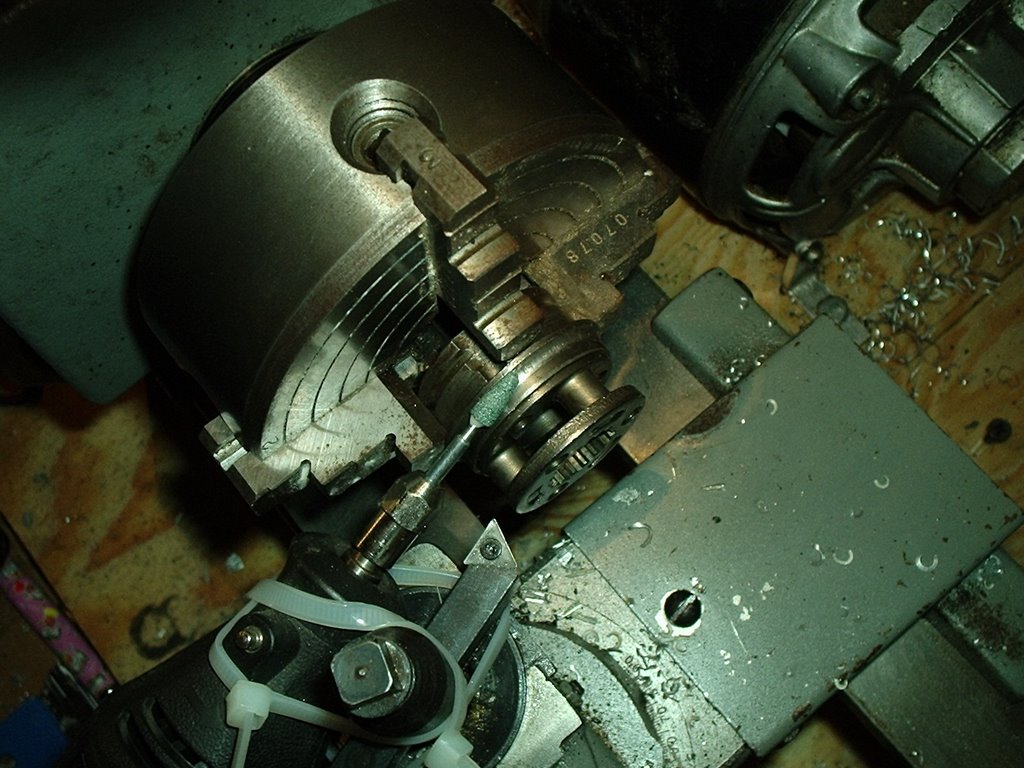
Now, in all honesty, I probably could have just greased the thing up at this point and put it back together. It's not like I am rebuilding a nuclear reactor or a jet engine here. But I decided to go for broke and refurbish the bearings myself. I own a small metal lathe, and this made the project possible. I chucked the part into the lathe and turned it down to a fairly slow speed. I zip-tied my Dremel tool to the tool post in approximately the right position to grind out the pits in the race with a small abrasive bit (note that the aluminum chips laying around aren't from this project--I was practicing bad machine tool hygiene by not cleaning up after the last project) :

Now, this method of attaching the Dremel may seem a little imprecise. It is. But that type of precision turns out not to be important for this operation. All that is really needed is a constant grind around the race. This is made possible by the rotation of the lathe and the fast rotation of the Dremel. The "float" created by the contact between the abrasive tool and the race keeps the two in a relatively constant relationship. I only took out a few thousandths of an inch, just enough to get below the bottom of the deepest pit in the race. As I understand it, the final shape of the race doesn't matter much as long as it is in certain bounds. Its main job is to have a concave surface against which to trap the ball against the concave surface of the opposing race. Far more important is the surface finish, which needs to be really nice and shiny. To get this, I risked losing a finger by polishing with emery cloth:


At first, the emery paper made a little musical note against the striations left by the grinding process. But as the striations were polished out, the process became quieter. I found that wrapping the emery cloth around the end of a wood ruler created a good tool for pushing into the races. I subsequently ground and polished the two other pitted races in a similar fashion. Here is one of the newly reground and polished races:

The races look really good--nice and shiny. I purchased two packets of new ball bearings at the local bike store and popped them into the old cages. They are 3/16" bearings. I micrometered the old and new ones because I was afraid that the hub would require metric bearings and that Wheelworks had given me English ones. The new and the old bearings were exactly (EXACTLY) .1875 inches, so they are EXACTLY right. Here are the reground races with their shiny new bearings:

One final unresolved question was whether I had ground away too much of the hardened bearing surface and exposed soft steel underneath. This would be bad because the hardened ball bearings would push into soft race material and eventually kill the race surface. I spoke with one of my friends who is possibly the world's preeminent metallurgist, and he felt that I would be fine. I ground off very little, and the material underneath is likely quite hard.

The hub went back together perfectly. I greased the bearings with Phil Wood's grease, and put a few teaspoons of Mobil 1 Synthetic oil in the oil nipple. This was my best guess given what people recommend for lubing other internal hubs.


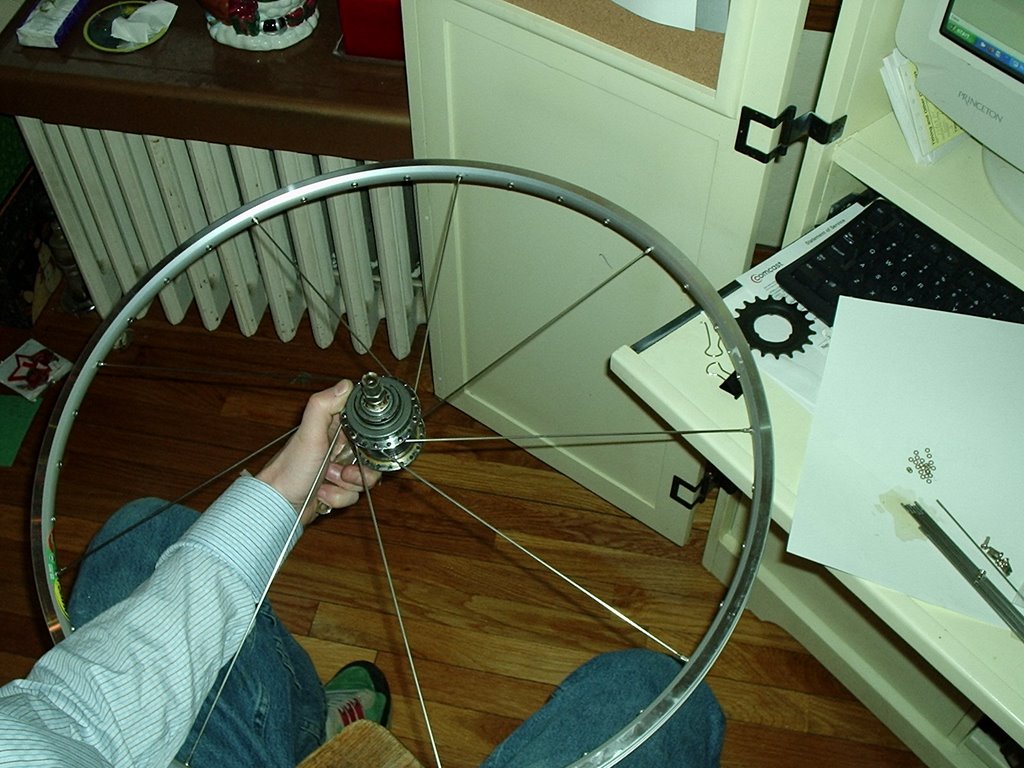
I laced up the hub with a Mavic 700c rim and DT Swiss spokes. There are 36 spokes, and I had to put tiny brass washers on the spoke heads because the Sachs steel is hard and does not "give" against the spokes the way aluminum does.


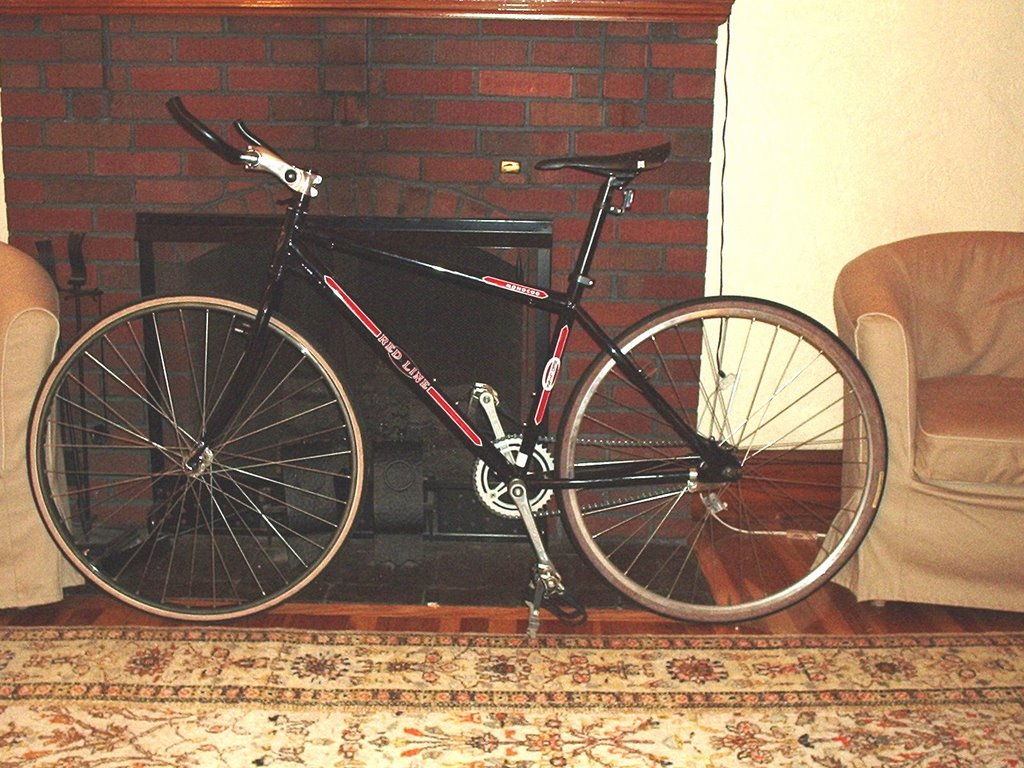
I mounted the wheel on my Redline Monocog and commuted for part of the 2005-2006 winter on the bike. It is AWESOME. I may end up selling the wheel, because I really am having a good time on the fixed gears.