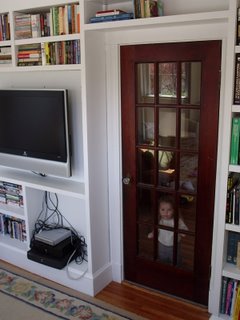
In a post below, you saw the built-in cabinets I built in our sunroom. The shelves are only 10.5 inches deep to preserve space in a narrow room. As a result, what Becca refers to as our Black Boxes (DVD player, TiVo, xBox) stick out and look really bad in the room. See below.
The wires hanging down are ugly, and the boxes are ugly, too. The wire problem can be solved with a cord tube (some thing like this from Amazon), but the black box problem is more intractible. To make matters worse, I bought a Sony 400-Disc DVD player from a friend a few weeks ago, with the thought of organizing all of our DVDs in the player. Our kids scratch our DVDs up, and they are only getting worse. (Parenthetically, the player turns out to be AWESOME--you can enter DVD information by plugging a PC keyboard into it, and it holds 400 DVDs. The player is a bit sensitive to scratches on DVDs. I got a disc repair machine to fix them, and it has worked great). The main downside of the DVD player is that it is BIG (it's not seen in the photo above), and it pushed the whole black box issue over the edge for us. On the other hand, it has freed up a ton of space on shelves we had devoted to DVD storage.
I have thought for a while that it would be cool to put all of our black boxes in the basement of our house, with the TV being the only visible audivisual component in the house. I imagined that all I really needed to do this would be longer cables and cords, a hole in the floor, and something to transmit the remote control signal down to the black boxes in the basement. Radio Shack sells a wireless remote extender that takes signals from a little box by the TV and sends them to somewhere else in your house wirelessly. I bought this, and it works like a charm. I built a little table in the basement for the black boxes to sit on, routed the cables up through the wall, and placed the little IR repeaters under the TV and on the black box table.
The only part of the project that isn't complete is wiring the surround sound from the surround sound receiver in the basement up to speakers in the room. But there is enough room to do this, and I am waiting to find a good deal on a Bose system on eBay or Craigslist. Here is my powerpoint diagram of what the system sort of looks like. Those black things on the floor by the chairs are the speakers. I hope to find some small white ones that are not that conspicuous.
Monday, September 18, 2006
Thursday, September 14, 2006
The Big Scare
Long story short, when I was accelerating hard two days ago I heard a lound bang followed by ominous sounds. I had the car towed back to my house and basically went into a funk for a day or two while I pondered worst-case scanarios. A really nice rebuild of one of these engines can cost $20,000. I can't get behind that. There was nothing obviously wrong that I could see by looking under the car or under the hood. It turns out is was a spark plug that had flown out. It was cylinder 3, the farthest forward on the driver's side. I tried to very carefully and gingerly start it back in its threads, but it got about two turns on it and I ran into enough resistance that I was afraid to proceed. Looking at the spark plug itself, there were no burnt threads or other obvious signs of damage.
As I saw it, I had four alternatives:
1) force the plug in and hope to get through the bad threads and find the real threads (seems like a bad idea).
2) attempt to chase the existing threads with a tap
3) try to do a timesert with engine in car. Not sure if this is possible.
4) drop motor and do it right with a timesert. I am hoping NOT to do this because my workspace location is not ideal and frankly I really hate dropping motors.
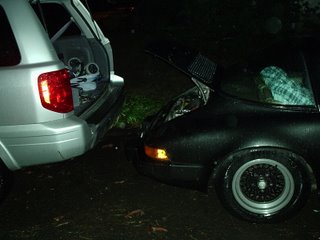
Speaking of workspaces, it was raining outside tonight when I did this. So I pulled Becca's Honda back to the car and used the hatchback as a tent. Man, I need a garage. Like really need.
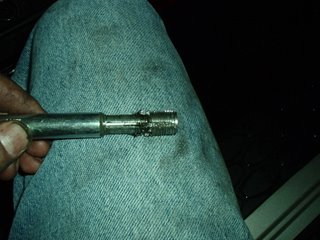
I consulted the Porsche message boards at Pelican Parts, and someone suggested buying a special tap that is made for just this purpose. It is called a Back-Tap, manufactured by KD Tools.
The new tool worked. I decided to remove the valve cover, and it gave me enough clearance to get the tool in. The first photo is of the scene of the crime. I have removed heater hoses, spark plug wires, and valve cover. It's a little dirty down in there.
Here is the tool. I coated it with my favorite bearing grease to catch chips. This is bicycle bearing grease from Phil Woods.
Here I have inserted the tool in the spark plug hole. It took a bit of searching. The piston, by happy coincidence, was nowhere near the top of the cylinder. The tool was able to sink in all the way until its shoulder seated. Here I am using my wife's makeup mirror, and you can see the tool sticking out.
It was quite difficult to get the tool engaged--you have to twist the knob while holding the tool still. Doing this in the close confines of the engine compartment is not easy. I was juuuust able to do it one-handed, but then figured out how to get two arms in there. I then gingerly tried to back the tap into the threads. It wasn't easy--I kept referring to the mirror to make sure the tool was centered in the spark plug well. Finally, I got about a full turn on it but then ran into too much resistance to continue by hand. I stewed about the decision of whether to put the ratchet on it and apply more force. Finally after checking and rechecking that it was centered, I did it. It resisted a bit, but not so much as to cause me to worry. I backed it out slowly and---voila. The tap was covered with aluminum chips:
I started the spark plug back in the hole without any further cleaning or messing around. I figured that I could cause more trouble than I would fix by blowing compressed air, etc. I put a very light amount of torque on the plug, wimping out when I got it just barely tight. Probably like 5 or 10 ft-lbs. I bolted everything all back together, checked the other plugs, put the hoses back on, and....
And then I got in and turned it. It fired right up, no loud noises. It sounded awesome, nice and raspy just like it should. Even though it was stone cold, I revved it quickly, blipping it a few times to 5000 RPM or so. My thought was that this would help blow crud out of the cylinder if I had inadvertently dropped stuff in there. I am really happy about this. I will be adjusting valves this weekend or next weekend, so I will have another chance to check torque on the plug.
I am not endorsing Amazon, but you can buy the tool from them at the link below. I get a cut if you do, but I am including it mostly so that there is no ambiguity about what it is:
New wheels on the way
One of the things I don't like about the Porsche is that it is fitted with BBS wheels. BBS wheels are very high quality wheels--they are manufactured in Germany and are approved by the TUV. But they look a little too "Miami Vice" for me. The proper original equipment wheels for this car, on the other hand, look exactly right to my eye. They are the famously strong forged Fuchs wheels (say that three times fast). These were manufactured in a way that placed performance and durability over cost. So I shopped around online for a while and found some being advertised on the PCA website. They come with Pirelli P7 tires. Here is a photo. I am excited to get them on the car to see how it looks and drives.
Subscribe to:
Posts (Atom)